23 Makeup Tips for beginners

Welcome to my blog where You will find out 23 makeup tips for beginners. I am not going to start with the history of makeup i.e., how it started over 8000 years ago in Egypt, and how in Ancient Greek and Roman Empires, colored powder from plants and fruits was mixed with lead-based dye and mercury to create “Natural Looks” of Makeup. Instead, I will get straight to the point.
I am assuming you are here because you have recently developed a passion for looking nice or creating colorful looks with makeup, so let's dwell on this. First of all, I would like to welcome you to the beautiful world of makeup.
Before start applying makeup on your skin (particularly your face), you need to know some basic facts about your skin and types of makeup products in order to achieve a flawless look. Different ingredients and formulas are used in different makeup products to cater to the needs of different skin types.
1. Know Your Skin Type!
There are 6 basic types of skin: Normal, Dry, Oily, Combination, Sensitive, and Aging.
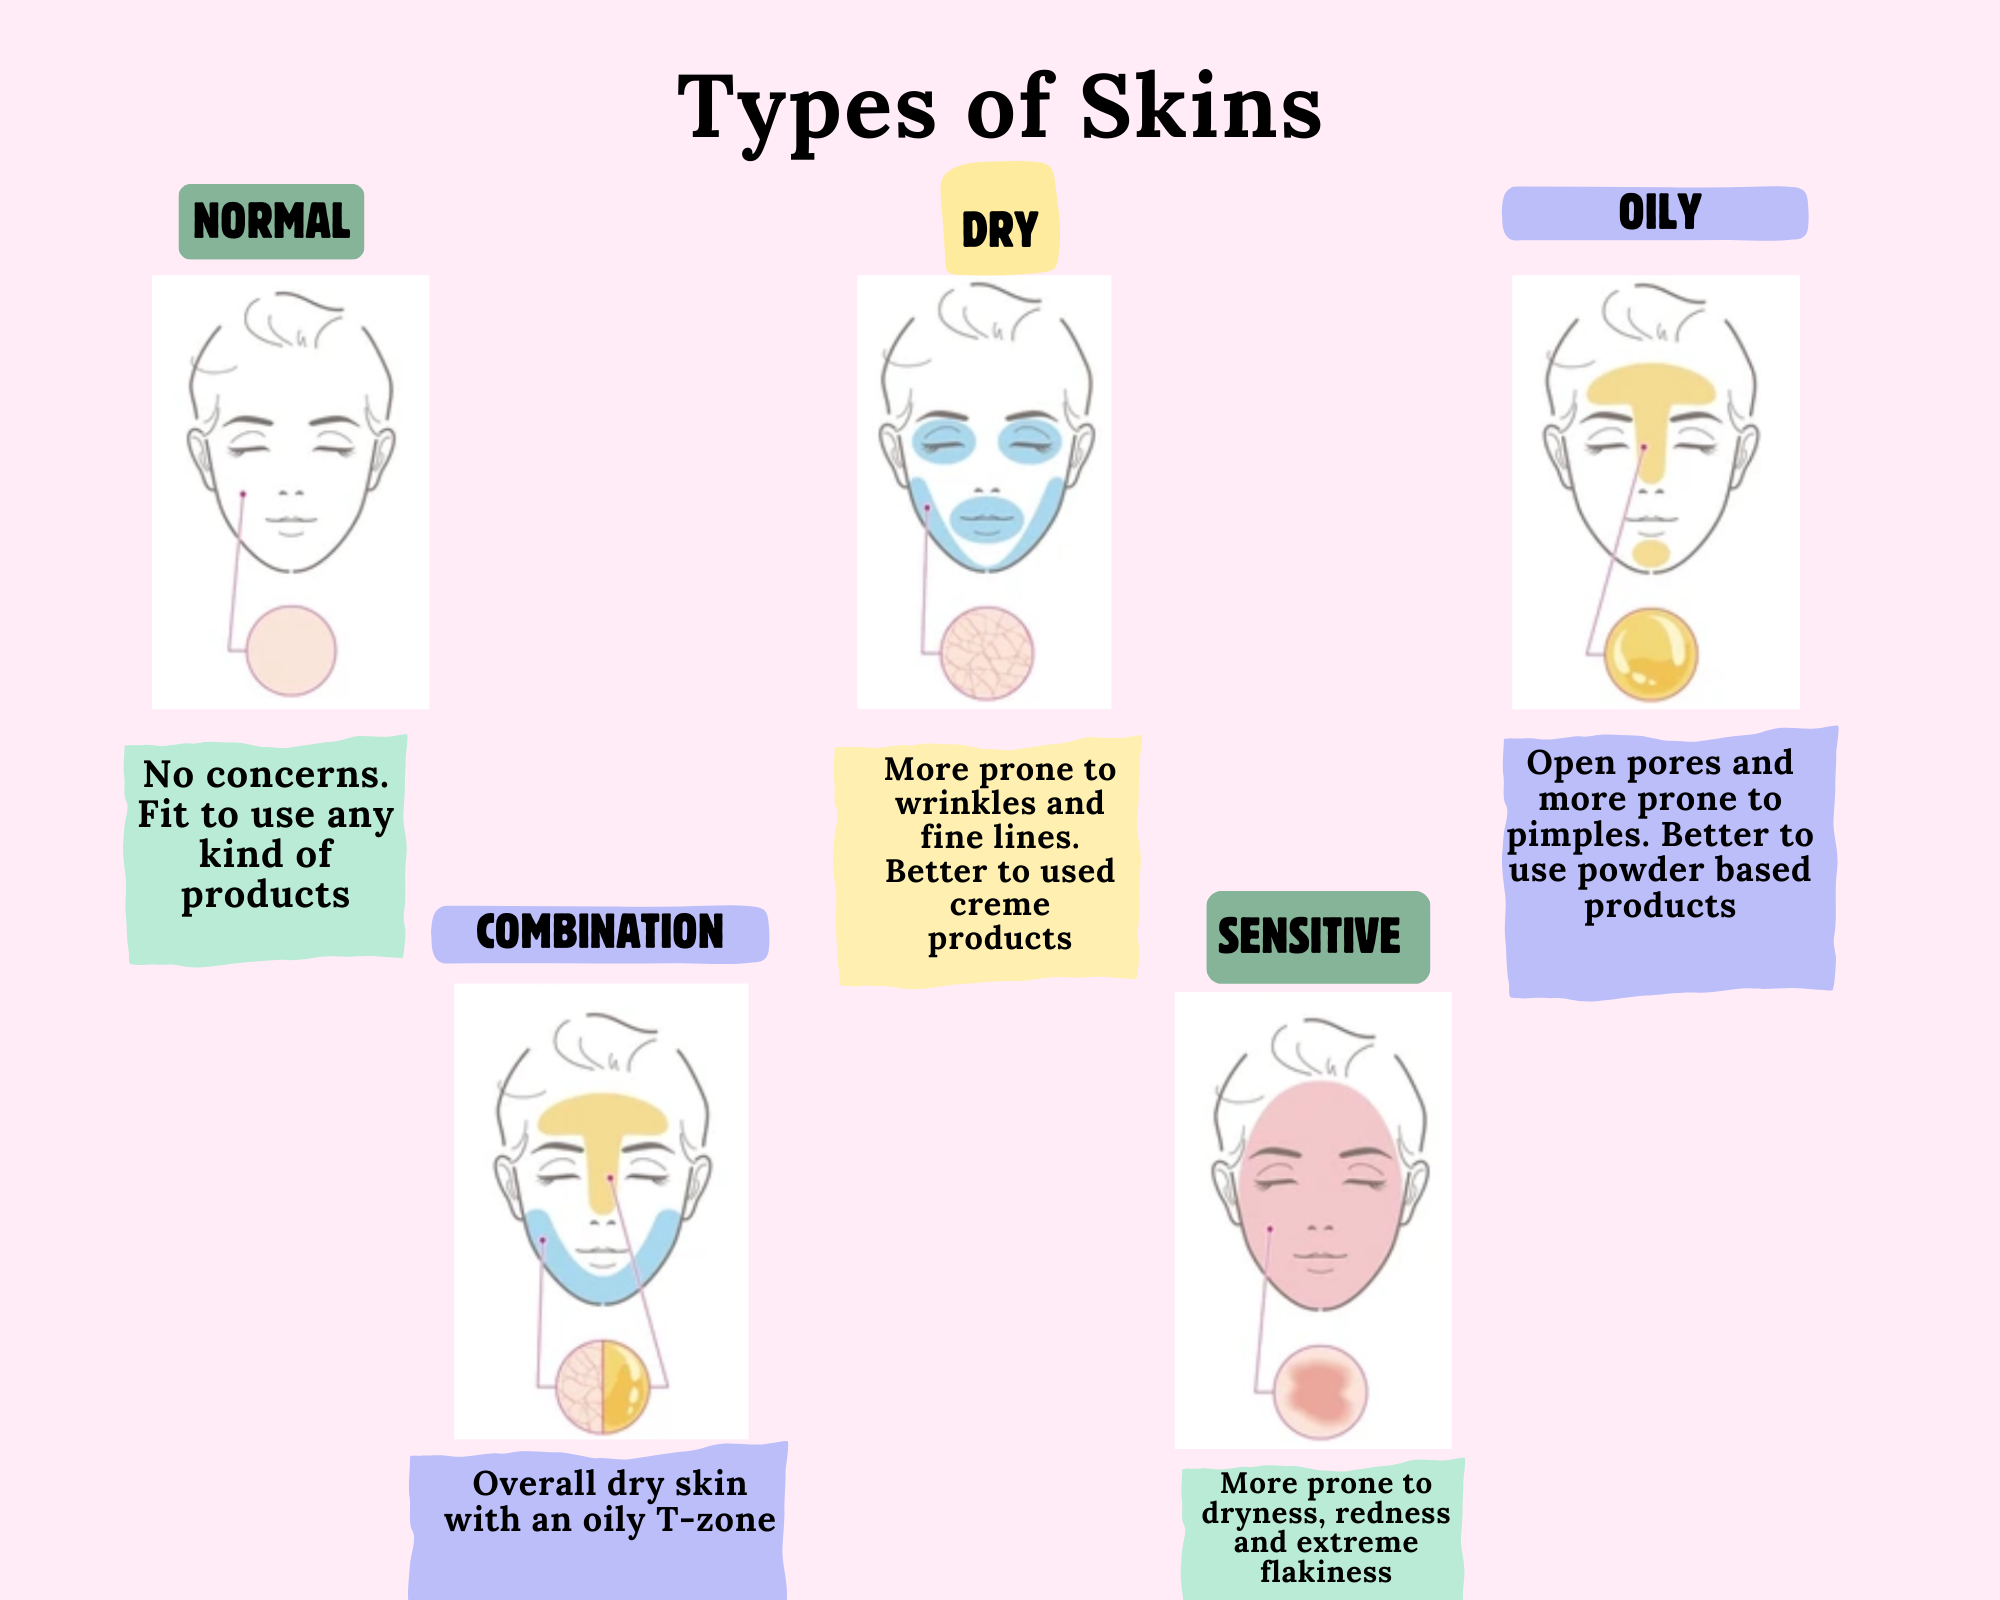
(a) Normal Skin
If you have a Normal skin type, Congratulations! You can basically use any type of makeup without worrying too much and slay your makeup look with minimum effort. You can use water as well as oil-based products, in powder, cream, or liquid form, with either a Matte or Dewy finish. Your canvas is ready to become a masterpiece!
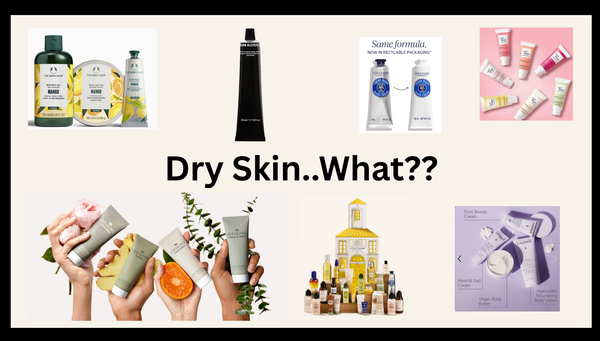
(b) Dry Skin
If you have dry skin, You are still in the safe zone and need not worry too much as there are plenty of options for you to cater to your skin’s needs. Having dry skin means you are more prone to developing wrinkles and fine lines. Dry skin can also become flaky and you may develop a layer of dead cells on the outermost layer of your skin.
However, all these problems can easily be solved by using good-quality oil-based moisturizers. Before applying makeup, you should always properly moisturize your skin.
When it comes to makeup, you should use oil-based foundations. For blush and bronzer, you should lean towards liquid or cream formulas, which have a dewy finish. An upside to having dry skin is that you don’t have to worry too much about your makeup lasting long.
For setting your makeup, you can use a pressed powder or a makeup-setting spray with a dewy finish.
(c) Oily Skin
If you have oily skin, you have a lower chance of developing wrinkles and fine lines, but your skin is more prone to pimples and open pores. Pores are present on all types of skins, everywhere! Unfortunately for oily skins, they are open (as they release the oils) and hence are more visible.
But if you keep the pores clean and prevent them from clogging, you can minimize the appearance of these pores. Moreover, you might want to use water-based foundations. For blush and bronzers, you should lean towards powder formulas with a matte finish as they can neutralize the shine from oils on the skin.
You will need to pay more attention to keeping your makeup in place, as the oils can make the makeup move around and mess up your look. You might want to use loose-setting powder or a makeup setting spray with a matte finish to lock your makeup in place.
You also might want to always have a blotting paper at hand, in order to absorb all the excess oils from your skin in case they make an appearance on your face unannounced and want to mess with your makeup look.
(d) Combination Skin
Some people have dry skin on the base but an oily ‘T-zone’ which means that their skin is oily on the forehead, nose, and chin. This gets a little tricky as you have to use both types of products (for dry as well as oily skin). Some companies make special products for combination skin.
Clinique (Combination-skin line), Paula's Choice's essential RESIST line, and Cera Ve Products are a few examples. If the oily pores are strictly restricted to the T-zone, you can use cream or liquid blush and bronzers (in addition to the powder formulations) but you should prefer makeup products with a natural finish (rather than a matte or dewy one).
(e) Sensitive skin
Some people have sensitive skin i.e., their skin is more prone to redness, extreme dryness and flakiness, and breakouts, as compared to other people. While sometimes, sensitive skin is caused as a symptom of other problems or infections, some people have skin that reacts to a wide range of chemicals and nutrients found in makeup and skincare. For this reason, sensitivity is considered as a type of skin.
According to Dr Debra Jaliman who is a board-certified dermatologist in NYC, sensitive skin can be managed by keeping it hydrated. This means that before applying makeup, you should properly hydrate your skin by using a good quality moisturizer and a hydrating primer.
Moreover, sensitive skin girlies should also steer clear of products having strong and active ingredients (like phthalates, parabens, etc.). Most importantly, the sensitive skin is easily triggered by fragrances in the makeup and skincare products. So, if you have sensitive skin, you should always try to find makeup and skincare items with CLEAN or NATURAL INGREDIENTS.
(f) Aging Skin
Aging skin is the one with fine lines and wrinkles. Aging is a natural process, and we cannot do anything to stop it. The best thing we can do is to acknowledge our aging skin and treat it specially. If you are 30 or over, start using Retinol, which can significantly delay the process of aging. Moreover, incorporate Vitamin C in your skincare to keep it healthy and glowing.
When you apply makeup to mature skin, the area under your eyes and around the mouth requires special attention. Never skip concealer and set it properly with a setting powder so that your foundation does not crease.
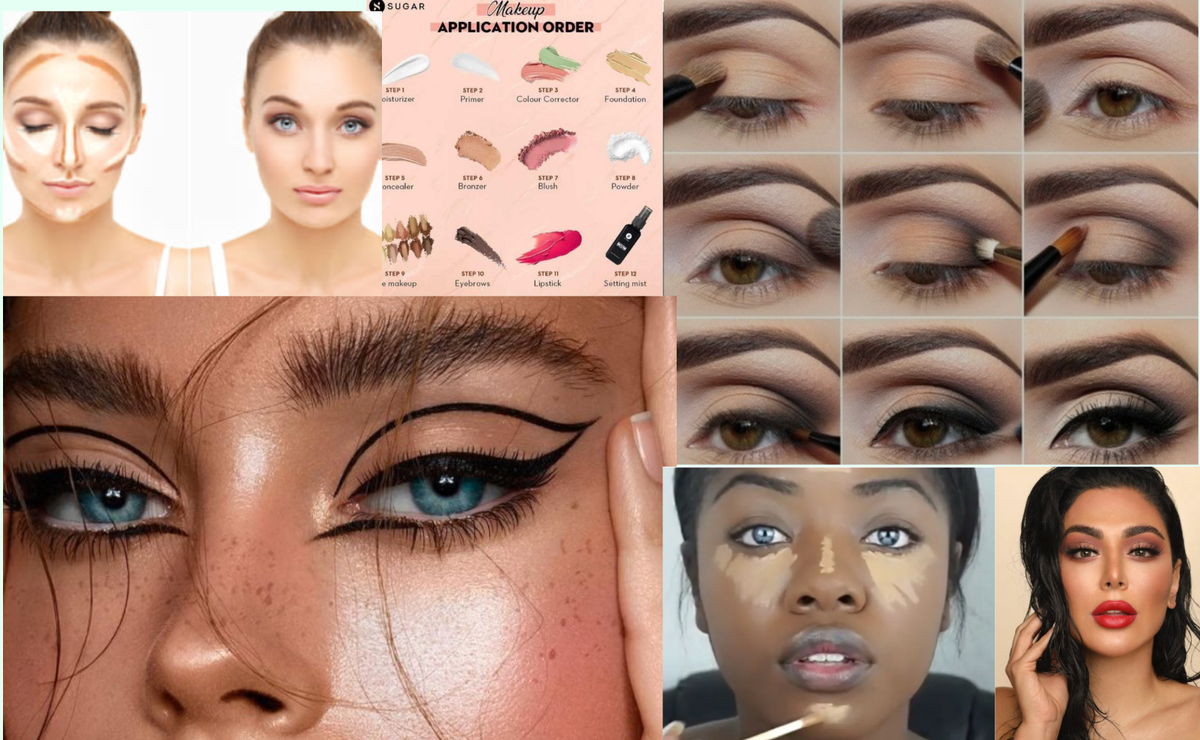
2. Always Prep your skin before makeup
The secret behind a flawless face of makeup lies in the fact that how well you prep it. After using a cleanser, toner, and moisturizer, start applying makeup, starting with a PRIMER.
3. Never Skip Primer
Never underestimate the power of a primer. It is a game-changer for a flawless makeup look. It creates a smooth canvas, filling in pores and fine lines, ensuring your foundation glides on effortlessly.
Primer also helps makeup stay put, preventing it from settling into creases or sliding off during the day. By forming a barrier between your skin and foundation, it promotes longer-lasting wear, making touch-ups minimal. Not only does it enhance the longevity of your makeup, but primer also enhances the overall finish, leaving you with a radiant and polished complexion.
For oily skin, use a mattifying primer, and for dry skin, use a hydrating primer. For aging skin, silicone primers work best as they magically diminish the appearance of pores, blemishes, wrinkles, and fine lines.
4. Tinted Moisturizer instead of Foundation
If you are just getting into makeup, it is a better idea to use a tinted moisturizer instead of a full-coverage foundation. The tinted moisturizer will give you a natural look and keep your makeup from looking cakey. You can also go for a BB cream (beauty balm) or a CC (color correcting) cream.
If you want to use a proper foundation instead of BB or CC cream, then better go for the one with low to medium coverage. It will not cover all of the hyperpigmentation or acne scars that may be present on your face, but it will even out your complexion. At this point, that is exactly what you are looking for.
Remember! Never ever put any kind of makeup on your face without evening out your complexion. Otherwise, it will look horrendous.
5. Never Miss Your Neck
While applying your base makeup (i.e., foundation or tinted moisturizer), Never miss your neck! The last thing you want is your neck to be a different color than your face. Even if you have a perfect face of makeup, but the color of your face doesn’t match your neck, IT WILL NOT LOOK NICE.
6. Use soft and light shades for eyeshadows
If you are just getting started on makeup, try to create natural looks with a subtle pop of color. Preferably use nude shades (different shades of brown, pink, and beige). After mastering the art of blending, experiment with dark or bold shades on your eyes.

7. Use a Beauty Blender to blend your eyeshadows
After applying your favorite eyeshadows on your eyelids, blend them with BEAUTY BLENDER or a SPONGE for a seamless finish. This technique will take your makeup look to the next level as the makeup game is all about blending; it always has been! (Thank me later for this pro tip. I am sure you have never heard this before!
8. Use Artificial Eyelashes
If you are a fan of bold-eye makeup looks and darker shades, always wear fake lashes with that look. You will be amazed to see how falsies diminish minor or even major blending blunders on your eyes and elevate your eye as well as your overall makeup look.
Even if your winged or thick eyeliner is applied unevenly, it will not be noticeable with your artificial eyelashes on.
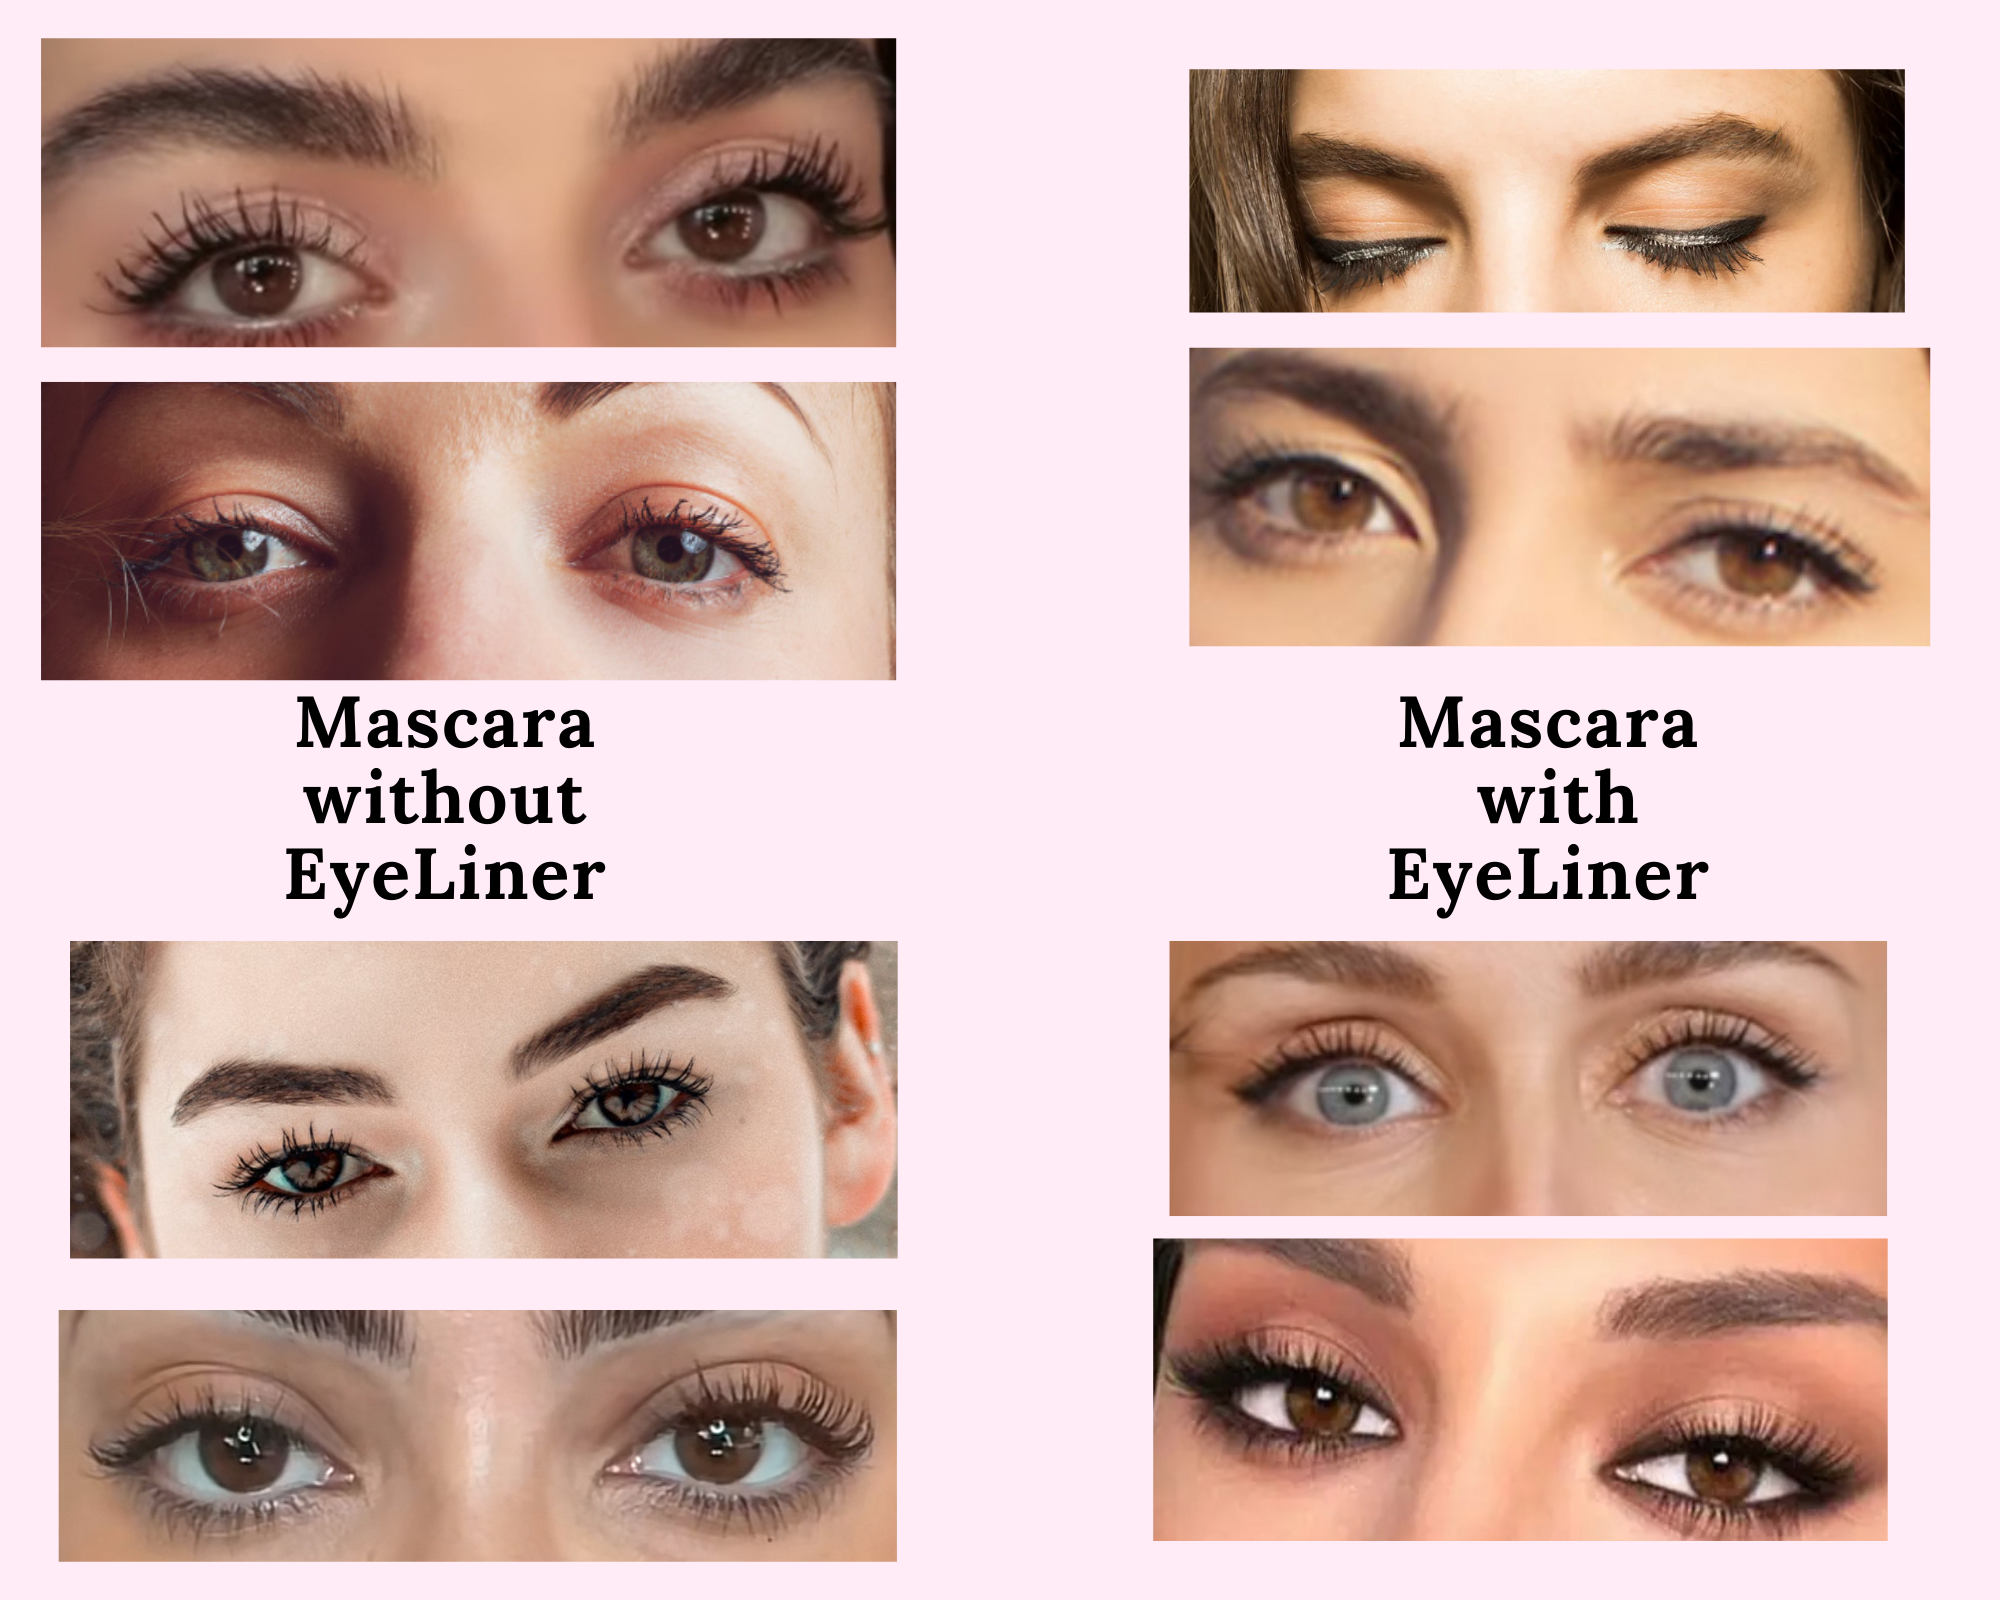
9. Use mascara without Eyeliner.
If you are new to the world of makeup and are a fan of soft and natural makeup looks, always wear Mascara without an eyeliner. If you want to wear eyeliner, try a lighter shade (like brown or bronze) instead of black. This will softly define the shape of your eye without adding too much drama.
P.S. Don’t use this hack with artificial eyelashes.
10. Choose your Mascara wisely
Different Mascaras have wands (or brushes) with different shapes that serve different purposes. Mainly Mascaras are of 3 types: (1) Curling (2) Lengthening and (3) Volumizing.
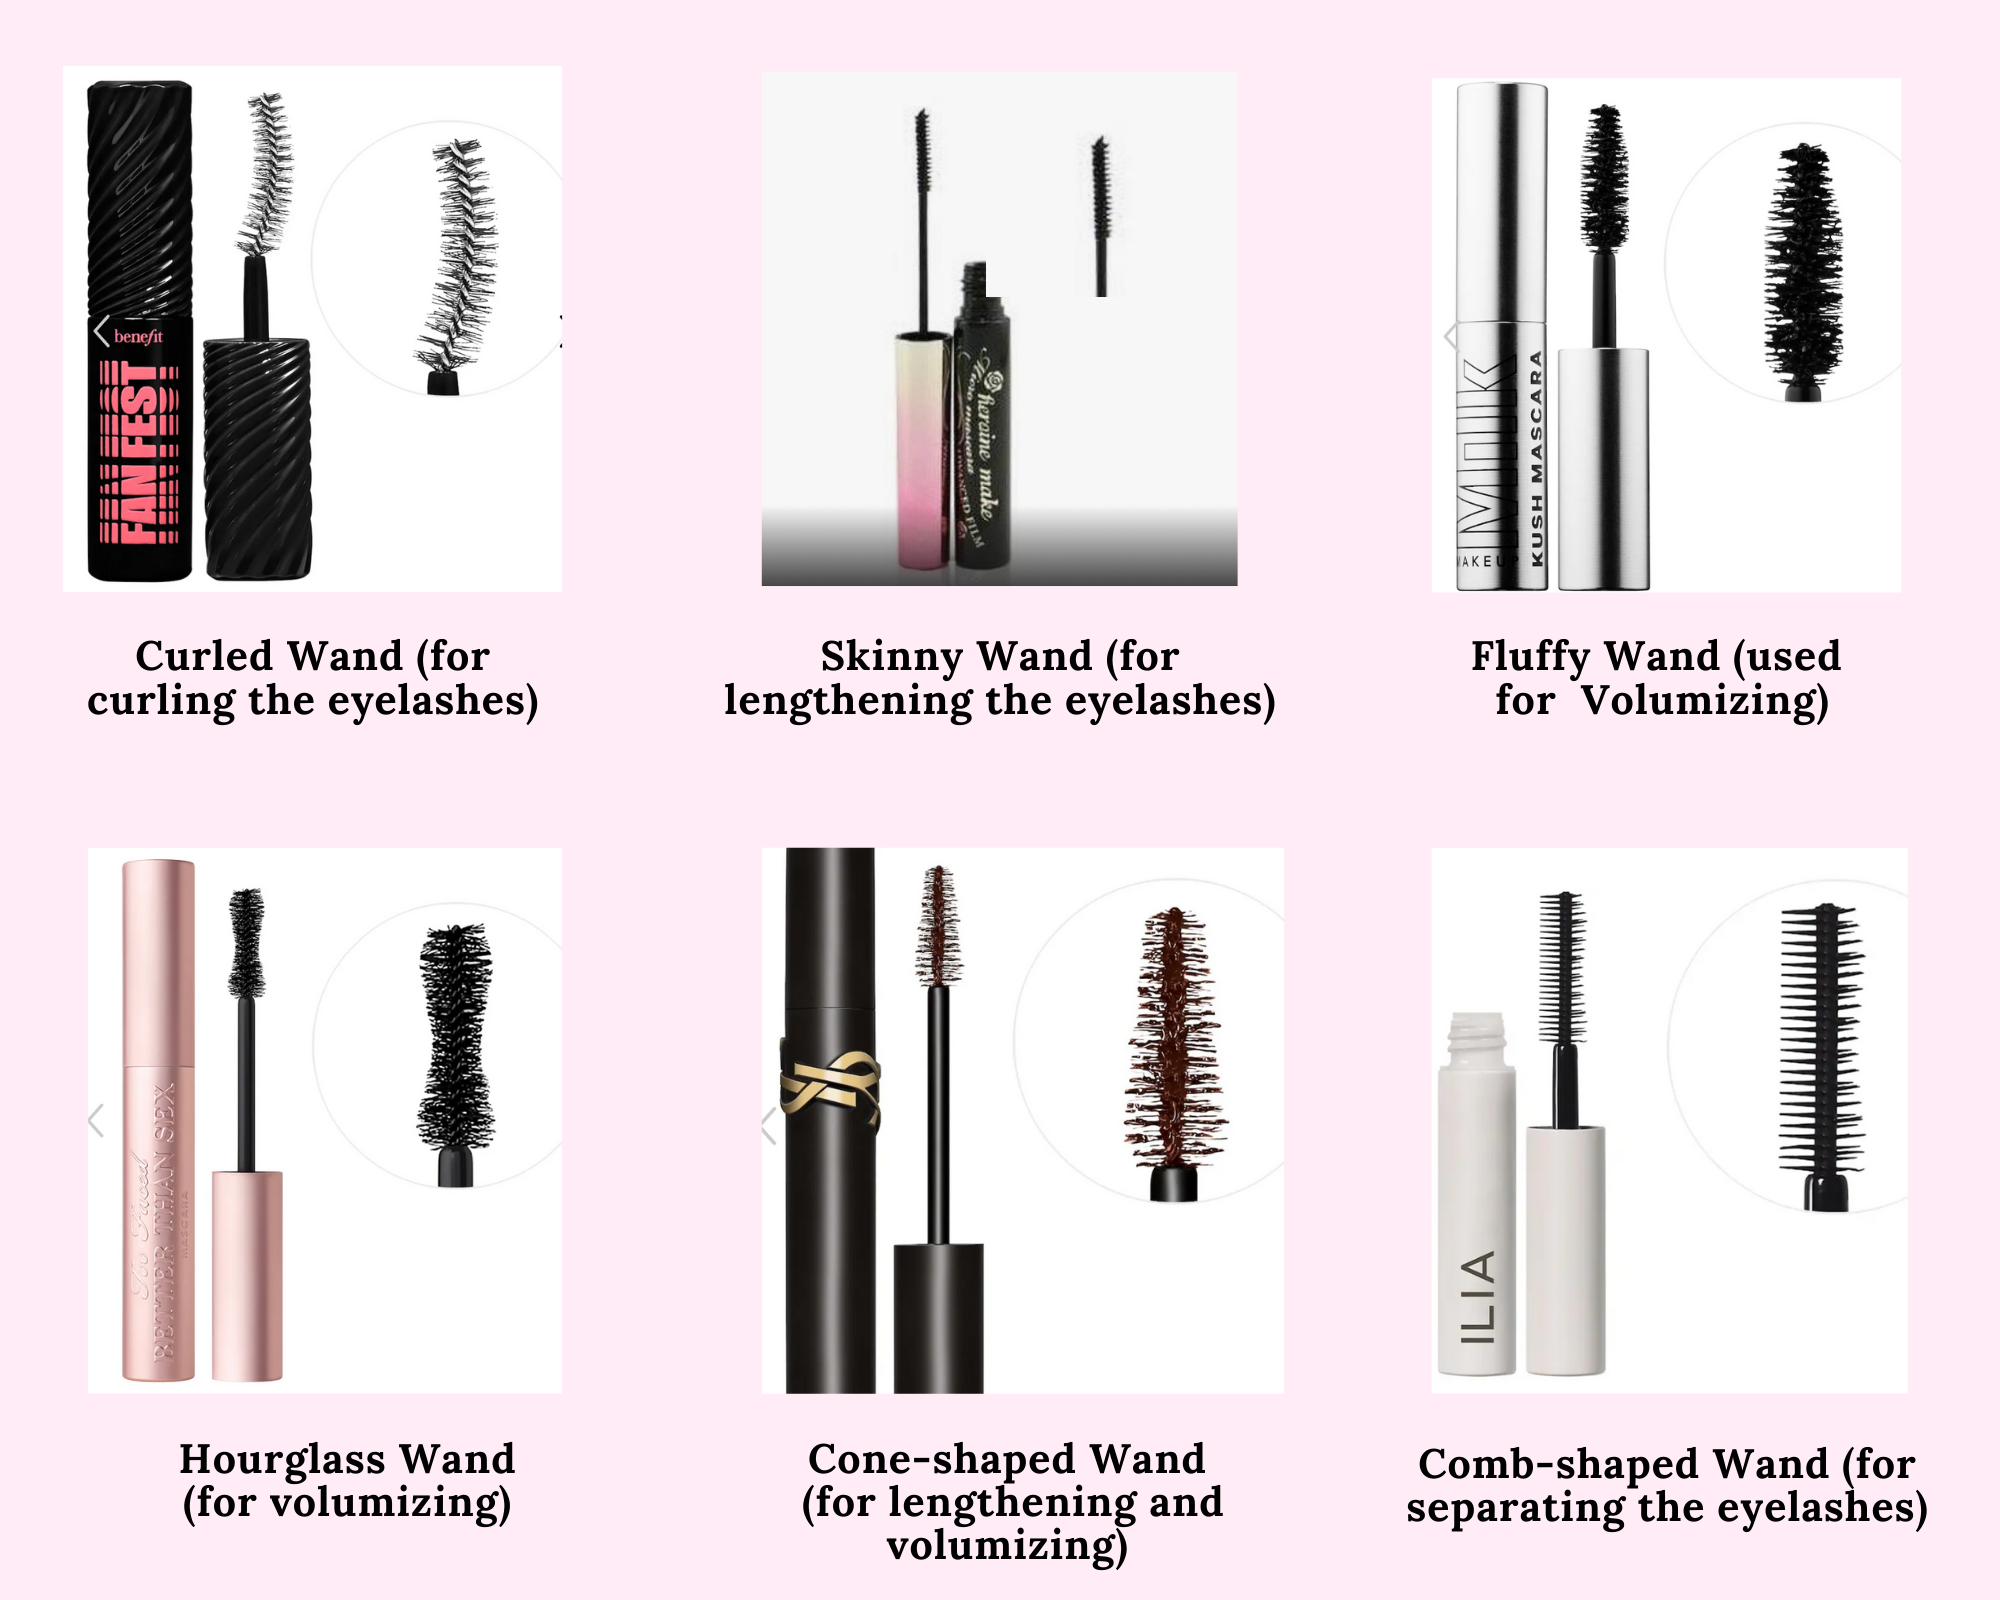
A Curling Mascara has a curved wand that gives a gravity-defying curl to your eyelashes. A lengthening Mascara has a very skinny wand that works like magic and drastically lengthens your eyelashes. A Volumizing mascara has a very thick and fluffy wand, that fully coats your eyelashes and makes them appear fuller and thicker.
Some mascaras have wands that are tapered in the middle (hourglass-shaped), which aligns with the shape of our eyes while applying the mascara and gives extra volume (or drama) to our eyelashes. Others have wand tapered at the end (cone-shaped) that lengthens as well as volumizes our eyelashes. Some Mascaras have a comb-shaped wand that separates our eyelashes while applying.
Normally Mascaras are not waterproof or smudge-proof, so if you are wearing mascara, be careful not to cry or even touch your eyelashes, otherwise, it will give you a black eye!
Using a waterproof mascara is also very tricky. It stays put throughout the day and looks very nice. But the problem is: it does not come off even when you want it to! You wash it with soap, cleansing balm, or whatever you have on your hand, it just does not dissolve in water.
Your best bet with it is to use a cleansing oil. Even after that, you would think that it has come off, but it will ruin all your towels, clothes, or anything that comes into contact with your eyelashes FOR DAYS! So, the safest option is to use a SMUDGE-PROOF mascara, that stays put like the waterproof mascara but does come off upon washing with water.
11. Use Concealer under and around the eyes!
Never Underestimate the power of a concealer. The concealer under our eyes not only hides our dark circles, but it also brightens our under eyes and gives us a filter-type look in real life! Moreover, Concealer can also be used to define the shape of our eyes and clean up (the not-so-cleanly applied) eyeshadow around the eyes.
12. Brow Pencil Vs Brow Gel
For eyebrows, there are two main types of products: Brow pencils and Brow gels. As a beginner, it’s better to use a brow pencil as it is buildable and easy to work with. Moreover, it gives our eyebrows a natural finish. As you gain expertise in applying makeup, you can gradually switch to a brow gel.
Brow gels are of two types: Clear and tinted. If you have long eyebrow hair, you can use a clear brow gel to hold your brows in place as a beginner. In my personal experience, it is very tricky to use a tinted brow gel as a beginner as things can get out of hand pretty fast!
13. Bronzer Vs Contour
There is a very fine line between a contour and a bronzer. A Contour has a grey undertone and is used to sculpt the shape of your face while a bronzer adds warmth or color to the face. As a beginner, you can use a bronzer to serve both purposes.
Just like a primer, never underestimate the power of a bronzer. It also elevates your makeup look significantly, with minimal effort!
14. Neutralizing orange bronzer
If you have a light skin complexion, there is a big chance that the bronzer will look orange on you. You might have to try a bunch of bronzers to find your perfect shade (that only adds a subtle warmth to your face without turning you into an Oompa Loompa).
The good news is that you can fix your orange-looking bronzer by using a red color corrector before applying your bronzer. The red color will neutralize the orange hue and give you the perfect golden glow!
15. Use a Liquid blush
If you are new to the world of makeup and don’t have oily skin, go for liquid blush. Liquid blushes are easy to blend and give the most natural and glowy finish to our makeup.
16. Lip and Cheek Tint
Lip and cheek tint is also a great option for beginner makeup artists as they are easy to apply and blend. They give the most natural flush of color to the face and stay put for a long time. These tints work for all skin types (except oily) and give the most beautiful and natural finish to your makeup look.
17. Use Nude and Natural-colored lipstick.
As a beginner makeup artist, opt for natural or nude shades in lipsticks. Try to pick a shade that looks like your lips, but better. Remember, nude shade is different for every person (as it depends on the color of your skin as well as your lips).
Your perfect nude lipstick should match the color of your lips, not your skin, otherwise, it will wash your face out and you will look like you don’t have any lips!
18. Always check your teeth after applying lipstick
Sometimes when we apply lipstick, it gets on our teeth! You don’t want to go out or meet someone with lipstick on your teeth. So, always check your lips after completing your makeup look!
19. Properly Remove your makeup
No matter what stage of your makeup journey you are in (beginner or expert), always remove your makeup properly at the end of the day. It is best to use a cleansing balm or a cleansing oil to dissolve all kinds of long-lasting makeup.
Makeup-removing wipes used to be all the rage not very long ago, but they are not anymore, as they do more harm than good. Now dermatologists recommend against using these wipes as they can make fine lines appear (especially around your eyes).
You can also use micellar water or makeup-removing liquid with a cotton pad. But, make sure to swipe the cotton pad against your face one last time, such that it stays clean (which means that all the makeup has come off).
If you don’t remove your makeup properly (before going to bed), there is a high chance it will clog your pores and make you break out.
20. Focus on skincare
Remember that skincare is just as important as makeup. In fact, with the right skincare products, you can permanently achieve a perfect-looking glowy face.
Nowadays, many makeup products come with skincare ingredients (like serum foundations, mascara with brow serum, blushes with AHA, etc.,) that can serve both purposes.
21. Buy travel size or sample products
As a beginner makeup artist, I strongly suggest you buy travel-size products as they are cheaper to buy (as compared to full-size products). So, you can try more products with the same amount of money. Moreover, most makeup products are good to use for only 12-18 months after opening.
If you are not a professional makeup artist, there is very little chance that you will finish your makeup product before it expires. So, it is wise to invest in the travel-size products of name brands for less price.
22.Try makeup Subscription Boxes
If you are just getting into makeup, I strongly suggest you try out makeup subscription boxes. But beware, they are HIGHLY ADDICTIVE.
A decent makeup subscription box will cost you around $35, in which you will receive 5 full-sized makeup items from name brands (mostly). There are other subscriptions as well (like Macy’s beauty box, IPSY glam bag, etc., ) that cost less than $20 a month and you get small makeup or skincare samples from decent name-brands.
If you cannot afford to spend $30/month on a subscription box, you can sign up for a bimonthly box (that you receive every other month instead of every month). Some services offer a bimonthly plan as well (like IPSY), while in other cases, you will have to manually manage your subscription to receive your box every other month, but it will totally be worth it!
If you want to buy a rare beauty blush or too-faced mascara, it will cost you around $25-30. While in a subscription box, you will get 4 additional products for the same amount of money. As a beginner, you will love and enjoy trying out new brands and products.
23. Do not follow makeup gurus blindly
If you have gotten into beauty and makeup, there is a huge chance that it was because of social media beauty influencers. It is very entertaining to watch their videos, in which they try out new products, and give their reviews.
But beware not to be too influenced by them especially if you are to make a purchase. Almost all of the influencers GET PAID to talk about the products they feature in their videos. But the plot twist is that they use FILTERS while trying out those products and hardly ever give their honest reviews. If an influencer says a product is good, don’t just take their word for it.
You will find the user reviews on online stores (like Sephora, Ulta, Amazon, etc.,) more authentic and helpful while making a purchase.
Conclusion
Whether you are just starting on your makeup journey or you've already mastered the art, always remember that makeup is your personal canvas, and you're the artist holding the brush. The fundamental purpose of delving into this art form is to enjoy the process. There is no definitive rulebook on achieving a particular look – it's all about having fun and expressing yourself. If you're not having fun, then you might be missing the essence of it all!
Just like any skill, perfection comes with practice. It's the little nuances like using primer, bronzer, and concealer that transform your makeup from novice to expert. These are the brushstrokes that set a professional look apart from a beginner's attempt.
So, grab those brushes, blend like there's no tomorrow, and let your makeup journey be a riot of colors and laughter. Happy beautifying!